Choose training equipment that directly targets the five fundamental skills you need to improve. Start by assessing your weakest areas through honest self-evaluation or feedback from your coach, then invest in tools that address those specific gaps rather than buying everything at once.
The right equipment transforms practice time into measurable skill development. A shooting pad with puck return systems lets you take 300 shots in the time you’d normally manage 50, building muscle memory faster. Stickhandling balls of varying weights challenge your hand-eye coordination differently than pucks alone. Radar guns provide instant feedback on shot velocity, turning vague improvement goals into concrete numbers you can track week over week.
Off-ice training tools have evolved dramatically by 2026, offering realistic ice simulation that fits in your garage or basement. Synthetic ice tiles now replicate 95% of real ice friction, letting you practice edgework and transitions year-round. Balance boards and slide boards develop the core stability and lateral movement patterns that separate average players from elite competitors.
Position-specific equipment matters more than most players realize. Goalies benefit from reaction ball trainers and specialized slide mats. Defensemen should prioritize passing trainers that improve accuracy under pressure. Forwards get maximum value from speed and agility ladders combined with weighted pucks for shot power development.
Budget doesn’t have to limit your progress. A basic setup of a shooting pad, stickhandling ball, and resistance bands costs under $100 but covers the essentials. Scale up as you identify which training methods deliver the best results for your playing style.
Why Equipment Selection Makes or Breaks Your Training Program
Selecting the right hockey training equipment isn’t about owning the most gear, it’s about choosing tools that actually build the skills you’ll use in games. The difference between effective equipment and random purchases comes down to one principle: does it create the specific movements, speeds, and resistance levels you’ll face on the ice? When your training tools replicate real game conditions, your body develops what researchers call positive transfer, where equipment improves transfer of practiced skills to actual performance situations.
Quality equipment accelerates your development by providing consistent feedback. A proper shooting pad with the right glide coefficient teaches your hands the exact release motion you’ll use with a frozen puck. A weighted training puck that’s too heavy, however, programs your muscles for the wrong resistance and teaches a slower release you’ll have to unlearn later. That’s why equipment selection matters more than how many hours you practice, you’re either reinforcing correct mechanics or drilling flawed patterns deeper into your muscle memory.
The efficiency factor is equally critical. With the right tools, a focused 30-minute session at home delivers more skill gains than two hours of unfocused stick time with improper equipment. Resistance bands designed for hockey-specific movements strengthen exactly the muscle groups you fire during explosive skating starts. Generic resistance tools work muscles, but not in the skating-specific patterns that make you faster on ice. Every minute you train with purpose-built equipment compounds your improvement, while mismatched gear wastes time that competitive players can’t afford to lose.
Essential On-Ice Training Equipment
Skating and Agility Tools
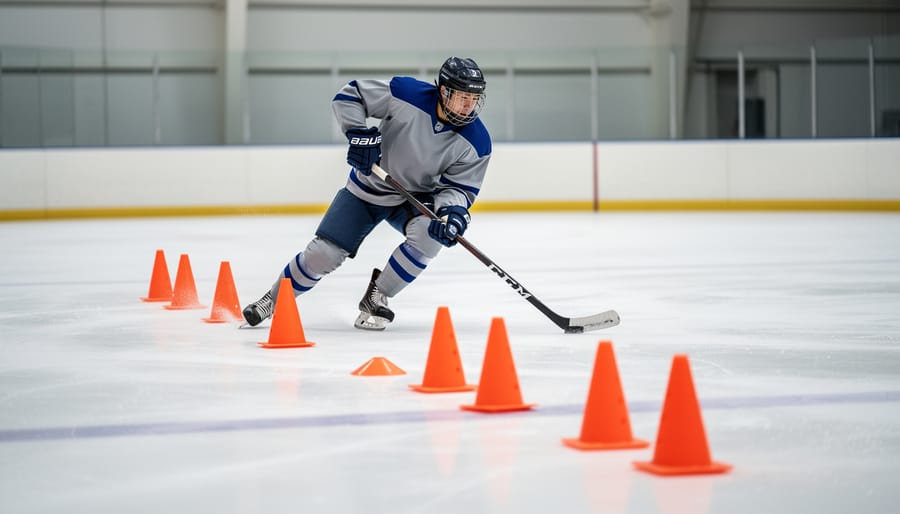
Skating separates good players from great ones, and the right tools accelerate your development dramatically. Training cones form the foundation of any skating program. Set them up in tight patterns to practice crossovers, transition drills, and quick direction changes that mirror game situations. Space them eighteen to twenty-four inches apart for rapid-fire footwork or widen the gaps to work on sustained edge control through wide turns.
Agility ladders force your feet to move with precision and speed. Lay one flat on the ice and run patterns like the Icky Shuffle, two-feet-in-each-square, or lateral shuffles. These drills wire your nervous system for quick feet and improve coordination under fatigue. Start slow to nail the footwork, then push your tempo until you’re moving at game speed.
Hurdles ranging from four to twelve inches high develop explosive stride power and hip flexibility. Stepping over hurdles during skating drills teaches you to lift your knees properly and extend through each push, crucial mechanics as you build your fundamentals. Mix heights within the same drill to challenge different aspects of your stride.
Resistance training systems like parachutes or weighted sleds attach to your waist and create drag as you skate. This overload forces your legs to generate more power per stride, building the strength and explosiveness needed for breakaways and gap control. Use these sparingly in your program since they alter your natural stride mechanics temporarily, making them best suited for short power intervals rather than extended skating sessions.
Puck Handling and Stickhandling Aids
Developing soft hands and exceptional puck control requires dedicated tools that challenge your coordination beyond standard practice. Weighted pucks, typically 10-20% heavier than regulation, force your wrists and forearms to work harder during each touch, building the strength needed for quick releases and one-handed plays. Start with 10-15 minute sessions using weighted pucks for stickhandling drills, then switch to a regular puck, you’ll immediately notice improved control and feel.
Stickhandling balls offer year-round training anywhere. Swedish-style wooden balls develop quick hands on hard surfaces, while heavier rubber training balls build wrist strength. These tools let you improve game basics in your driveway or basement without needing ice time.
Passing trainers, triangular rebounders or wall-mounted return systems, create the repetition necessary to groove accurate, tape-to-tape passes. They simulate give-and-go situations and let you practice receiving passes from various angles. Position multiple rebounders to work on cross-ice passing patterns.
Obstacle courses using cones, pucks, or specialized stickhandling kits force you to manipulate the puck in tight spaces. Arrange obstacles in figure-eight patterns or create random configurations that require constant puck protection and quick transitions. The unpredictability develops the adaptability you need when defenders collapse on you during games.
Shooting Development Tools
Developing a quick, accurate release separates goal scorers from players who just take shots. Shooting pads create the smooth surface your stick needs for proper weight transfer and follow-through. These polymer or synthetic surfaces replicate ice friction, letting you practice wrist shots, snap shots, and slapshots in your driveway without destroying your blade. Look for pads at least 4×8 feet to allow realistic shooting lanes and proper stride into your shot.
Target systems transform random shooting into precision training. Corner-pocket targets attach to regulation nets and force you to aim for the spots goalies can’t cover. Some advanced systems use sensor technology to track shot placement and velocity, giving you immediate feedback on whether you’re actually improving. The data matters: shooting two hundred pucks at a net teaches you nothing if you’re not measuring accuracy gains.
| Equipment Type | Primary Skill Focus | Best For |
|---|---|---|
| Shooting Pads | Release mechanics, follow-through | All levels |
| Target Systems | Shot accuracy, placement | Intermediate to advanced |
| Puck Rebounders | One-timers, quick release | Intermediate to advanced |
| Weighted Pucks | Shot power, wrist strength | All levels |
Puck rebounders train the skill most players neglect: shooting in rhythm without a windup. These angled boards return pucks at varying speeds, simulating passes that require instant releases. Quality rebounders let you adjust angles to practice one-timers from different passing lanes. Pair these with weighted pucks during some sessions to build the wrist and forearm strength that generates velocity without telegraphing your shot.
Off-Ice Training Equipment That Builds Game-Ready Skills

Synthetic Ice and Shooting Pads
Synthetic ice tiles and shooting pads have revolutionized home training by removing the seasonal barrier that once limited skill development to rink time. These surfaces let you practice stickhandling, shooting, and passing mechanics twelve months a year, right in your garage or basement.
Synthetic ice panels connect like puzzle pieces to create a skating surface that mimics real ice friction. The polymer construction allows you to glide in skates, execute crossovers, and work on edge control without leaving home. Quality matters here. Premium tiles use self-lubricating polymers that require minimal maintenance spray, while cheaper versions create excessive resistance that can actually reinforce poor skating mechanics. Expect to lose about 10-15% of your glide compared to real ice with top-tier products.
Shooting pads serve a different purpose. These smooth plastic sheets protect your floor while simulating the puck slide you’d get on ice. A standard 4×8 foot pad gives you enough room to practice wrist shots, snapshots, and one-timers. Many include a white surface with printed markings that help you work on shooting lanes and accuracy drills.
The real value shows up in repetition. When you can step into your training space any evening and take 100 shots or spend 20 minutes on stickhandling patterns, your muscle memory develops faster than weekend-only ice sessions ever allowed. Start with a quality shooting pad before investing in synthetic ice panels.
Stickhandling Trainers and Balance Boards
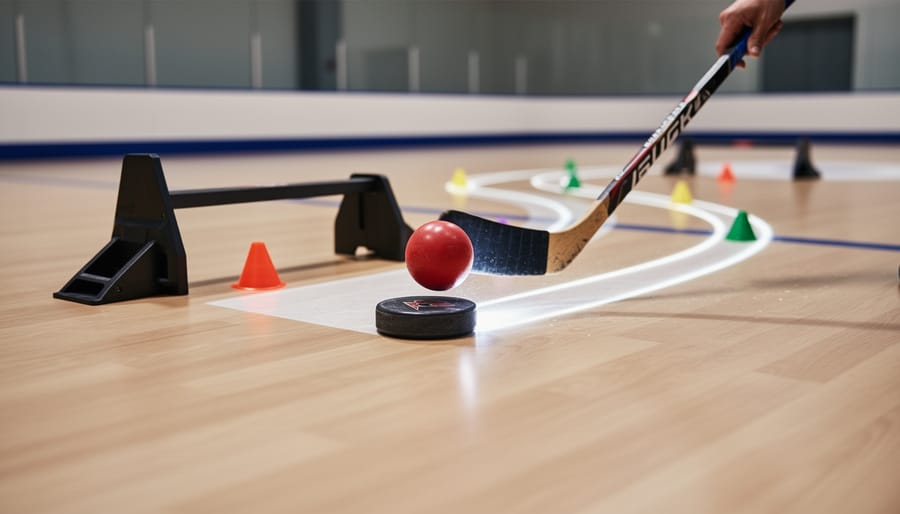
Off-ice stickhandling trainers replicate the feel of moving a puck without needing ice time, letting you rack up hundreds of extra touches per week. The Green Biscuit remains the gold standard, its patented design glides smoothly on concrete, asphalt, or basement floors while mimicking real puck weight and resistance. Practice your toe drags, figure-eights, and quick releases in the driveway, building muscle memory that carries directly into games.
Slide boards deserve a spot in any serious player’s setup. These low-friction surfaces let you practice lateral movements and weight transfers that mirror on-ice skating mechanics. A quality slide board (typically four to eight feet long) strengthens your hip flexors and adductors while improving your edge control and crossover technique. Pair ten-minute slide board sessions with stickhandling drills to simultaneously work on skating and puck touches.
Balance trainers, whether wobble boards, BOSU balls, or hockey-specific balance discs, force your core and stabilizer muscles to engage constantly. Stand on one while stickhandling to challenge your coordination under instability, similar to battling for position along the boards. Reaction balls (multi-sided rubber balls that bounce unpredictably) sharpen your hand-eye coordination and quick-twitch responses. Bounce one off a wall and catch it barehanded, then progress to corralling it with your stick blade.
Strength and Conditioning Equipment for Hockey
Hockey demands explosive power, rotational strength, and sustained endurance, qualities you can’t develop with ice time alone. The right off-ice conditioning equipment targets the muscle groups and movement patterns you use in every shift.
Resistance bands designed for hockey training let you replicate skating strides and shooting motions with progressive resistance. Look for heavy-duty bands with handles or door anchors that allow lateral movements, hip flexor work, and rotational core exercises. These build the explosive first-step acceleration that separates elite players from average ones.
Weighted vests (typically 10-20 pounds) add resistance to plyometric drills, jump training, and agility work without compromising your movement mechanics. Start light and increase weight as your power output improves.
Slide boards deserve special attention. These slick surfaces simulate the lateral push-off of skating, strengthening your hip abductors, adductors, and glutes while building cardiovascular capacity. A quality six-foot board with adjustable end blocks runs $150-300 and delivers conditioning workouts that directly translate to longer, more powerful shifts on ice.
Medicine balls (6-15 pounds) develop rotational power for shooting. Slam balls and battle ropes round out a complete explosive power toolkit that keeps you conditioned year-round.

Position-Specific Equipment Considerations
Different positions demand different skills, which means your equipment choices should align with what you’ll actually do on the ice. A forward who never takes slapshots from the point doesn’t need the same training focus as a defenseman anchoring the blue line.
Forwards thrive on quick hands, rapid shooting releases, and explosive acceleration. Prioritize stickhandling balls and obstacles that force tight puck control in confined spaces. Shooting pads with quick-release targets help develop the snap shots and wrist shots you’ll use most in traffic. Agility ladders and small hurdles build the first-step quickness needed to beat defenders one-on-one. Since forwards handle the puck constantly in game situations, weighted pucks during off-ice training develop the hand strength for better control under pressure.
Defensemen need equipment that builds powerful shots from distance, lateral mobility, and quick pivots. Resistance bands that mimic skating strides strengthen the muscles used in backward skating and tight turns. Heavy pucks (6-10 ounces) develop the shot power necessary to get pucks through traffic from the point. Wider cone spacing in agility drills trains the lateral movement patterns defensemen use to gap up on attackers and transition from backward to forward skating. Balance boards prove particularly valuable since defensemen constantly shift weight while defending against forecheckers.
| Position | Priority Equipment | Primary Training Focus |
|---|---|---|
| Forward | Stickhandling balls, quick-release targets, agility ladders | Hands, release speed, acceleration |
| Defenseman | Heavy pucks, resistance bands, balance boards | Shot power, lateral mobility, pivots |
| Goalie | Reaction balls, specialized slide boards, flexibility aids | Reflexes, lateral push, flexibility |
Goalies operate in their own universe of training needs. Reaction balls that bounce unpredictably sharpen the hand-eye coordination crucial for tracking pucks through screens. Goalie-specific slide boards (wider than player versions) train the explosive lateral pushes needed for post-to-post saves. Foam rollers and resistance bands focused on hip flexibility maintain the range of motion required for butterfly positioning and recovery. Since goaltending relies heavily on positioning and angles rather than skating, most standard skating training equipment offers little value.
The equipment that works for your linemate might waste your time and money. Assess your position’s demands first, then invest in tools that directly address those specific skills.
How to Choose Equipment for Your Skill Level
Choosing the right training equipment starts with honest self-assessment. Buy beyond your current ability and you’ll waste money on tools you can’t use effectively. Start too basic and you’ll outgrow them quickly.
**Beginners (First 1-2 Years Playing)**
Start simple. A basic stickhandling ball, set of training cones, and a shooting pad cover essential skills without overwhelming you. Focus on equipment that teaches fundamentals rather than advanced techniques. Synthetic pucks work better than regulation pucks at this stage because they’re easier to control and less intimidating. If you’re under 12, lighter weighted sticks and smaller training aids match your developing strength and coordination better than adult-sized gear.
**Intermediate Players (2-5 Years Experience)**
You’re ready for specialized tools now. Add resistance bands for shooting power, agility ladders for footwork precision, and passing trainers that challenge your accuracy. Weighted pucks make sense once you’ve mastered basic stickhandling, they’ll strengthen your wrists and improve puck feel. A quality rebound board pays dividends at this level because you’ve developed enough control to benefit from rapid-fire repetition. Consider position-specific equipment that addresses your role’s unique demands.
**Advanced Players (5+ Years or Competitive Level)**
Invest in precision tools and variable resistance systems. Electronic shooting targets with scoring zones, adjustable-weight training pucks, and professional-grade synthetic ice tiles maximize marginal gains. You need equipment that replicates game speed and pressure. Spring-loaded passing systems, reaction training lights, and balance boards with adjustable difficulty settings challenge your refined skills.
The smartest approach? Start with two or three foundational pieces, master them completely, then add complexity as your skills demand it.
Expert Interview: What Elite Players Look for in Training Equipment
We sat down with Marcus Thorsen, a skills development coach who has worked with NHL draft picks and elite junior players, to understand what separates effective training equipment from expensive distractions.
“The first thing I tell players is that equipment should challenge you, not compensate for you,” Thorsen explains. “If a tool makes a drill easier rather than forcing you to develop the actual skill, you’re wasting your time and money.”
When evaluating equipment for his training programs, Thorsen applies three criteria: transferability, durability, and progression potential. “Does this tool create movement patterns or resistance that translate directly to game situations? Will it survive intensive daily use? Can athletes progress with it as they improve, or will they outgrow it in three months?”
The most common mistake Thorsen sees is players collecting equipment without a training plan. “I’ve walked into garages filled with thousands of dollars in gear that never gets used consistently. A $30 stickhandling ball used daily beats a $500 shooting system gathering dust.”
For investment priorities in 2026, Thorsen recommends starting with fundamentals. “Quality synthetic ice tiles or a good shooting pad give you the foundation for year-round training. Add a weighted puck set and resistance bands next. Those four items probably represent 80 percent of what you need for serious skill development.”
He warns against chasing trends. “Every year there’s a new gadget promising revolutionary results. Stick with equipment that’s been proven over time. The basics haven’t changed because skating, shooting, and puck handling haven’t changed.”
His final advice: “Buy once, buy right. One high-quality piece used consistently will develop more skill than ten mediocre tools used occasionally. Focus on what you’ll actually use, not what looks impressive on social media.”
Building Your Home Training Setup on Any Budget
Setting up a productive training space at home doesn’t require a full-scale rink or thousands of dollars in equipment. With a strategic approach, you can build an effective setup that fits your space and budget while delivering real skill improvements.
Start by identifying your available space. A garage corner, basement area, or even a section of your driveway can work. You need enough room to handle a stick comfortably and move laterally, roughly 8 feet by 8 feet is a functional minimum, though 10 feet by 12 feet opens up more possibilities.
The key is prioritizing equipment that addresses your specific weaknesses rather than buying everything at once. A goalie working on lateral movement needs different tools than a forward focused on release speed. Be honest about which skills need the most work, then invest accordingly.
| Budget Tier | Core Equipment | Approximate Cost (2026) |
|---|---|---|
| Budget-Friendly | Green Biscuit, shooting pad (4×8 ft), basic cones, resistance band | $150-250 |
| Mid-Range | Synthetic ice tiles (6×10 ft), weighted pucks, passing rebounder, agility ladder, balance board | $600-900 |
| Premium | Full synthetic ice setup (10×20 ft), shooting target system, slide board, radar gun, video analysis tripod | $2,000-3,500 |
Even budget setups deliver results when used consistently. A $30 Green Biscuit and shooting pad let you practice stickhandling and shooting daily, which beats occasional ice time for building muscle memory. Add a basic cone set for footwork drills, and you’ve covered three fundamental skill areas for under $200.
Mid-range investments make sense once you’ve established a training routine. Synthetic ice tiles transform your practice quality, and a passing rebounder adds variability that keeps sessions engaging. This tier suits players training 3-4 times weekly who’ve outgrown basic tools.
Premium setups work for serious competitive players or families with multiple hockey players who’ll use the space for years. The higher upfront cost spreads across hundreds of training sessions, making the per-use expense reasonable. A radar gun provides immediate feedback that accelerates shooting development, while quality synthetic ice closely replicates on-ice conditions.
Maintenance and Safety Considerations
Your training equipment works hardest when you maintain it properly. Even premium gear degrades quickly without basic care, and worn equipment can actively teach bad habits or create injury risks.
Inspect your equipment before every session. Check shooting pads for cracks that catch stick blades, examine synthetic ice tiles for separation at seams, and run your hand along stickhandling balls for flat spots that affect roll. Replace items showing wear, a wobbly passing trainer or frayed resistance band isn’t just less effective, it’s dangerous.
Store equipment in a cool, dry space away from direct sunlight. UV exposure breaks down plastics and rubbers faster than regular use. Wipe down shooting surfaces after each session to remove moisture and prevent warping. Synthetic ice requires regular cleaning with mild soap and water; built-up debris creates friction that dulls edges and slows pucks.
Position-specific maintenance matters too. Goalie-specific rebounders need tensioning checks monthly, and targets should be secured firmly to prevent them shifting mid-shot. Before your next game practice, verify that all moving parts on training aids function smoothly, stuck pivots on agility cones or loose bolts on shooting targets compromise drill quality.
Set replacement schedules based on usage frequency. Heavy daily use means replacing stickhandling balls every four to six months, resistance bands every six months, and shooting pads annually. Light recreational use extends these timelines, but never ignore visible damage. The cost of replacement is minimal compared to reinforcing poor technique or risking injury from equipment failure.
The right training equipment doesn’t replace hard work, it multiplies the results you get from every minute you invest. A basic set of cones, a quality stick-handling ball, and a shooting pad can transform any garage or driveway into a development lab that produces measurable gains. Start there.
As your skills sharpen and your understanding deepens, expand strategically. Add resistance tools when you’ve mastered fundamental movements. Invest in synthetic ice once your edge work needs refinement beyond what a slide board offers. Layer in position-specific aids when you can execute the basics without thinking.
The players who separate themselves aren’t necessarily the ones with the most equipment. They’re the ones who use what they have with intention and consistency. Your $30 stick-handling ball becomes more valuable than someone else’s $2,000 home setup if you’re the one who uses it five days a week.
Build your toolkit around your actual training habits, not your aspirations. Master each tool before adding the next. The journey from average to elite happens one deliberate rep at a time, with equipment that matches where you are and pushes you toward where you’re headed.