
Effective 8U hockey practice plans run 45 to 60 minutes, focus 70 percent of ice time on skill development through high-energy drills, and keep players moving in short 3 to 5-minute rotations to match their attention span and developmental stage. At ages 7 and 8, young players build foundational skating, puck handling, and passing skills while learning to love the game, which means your practice structure matters as much as the drills themselves.
Coaches working with 8U teams face a unique challenge. These players are eager but easily distracted, capable of surprising progress but quick to lose focus when drills drag on. The best practice plans for this age group balance structure with fun, incorporate age-appropriate equipment, and prioritize engagement over perfection. You’re not preparing them for the NHL. You’re building confident skaters who understand basic positioning and want to come back next week.
This guide walks you through creating effective 8U practice plans that actually work on the ice. You’ll find specific drill progressions, equipment checklists tailored to young players, safety protocols that protect developing bodies, and sample practice templates you can adapt immediately. We’ve consulted youth hockey development experts and drawn from proven coaching methods to give you actionable plans that address the real needs of 7 and 8-year-olds.
Whether you’re a first-time volunteer coach or an experienced instructor refining your approach, you’ll discover how to maximize limited ice time, keep multiple skill levels engaged simultaneously, and create practices that develop fundamental skills while maintaining the energy and enthusiasm that makes youth hockey special.
Essential Equipment and Gear for 8U Practice Sessions
On-Ice Training Tools
For 8U players working on fundamental skills, having the right on-ice equipment makes the difference between a productive session and chaos. Start with a solid set of vinyl sport cones (30-40 pieces), these lightweight markers are easier for young players to move and safer than rigid pylons if a skater falls. Look for bright colors that stand out against white ice.
Pucks matter more than many coaches realize at this level. Stock at least 20-30 regulation pucks, but also invest in lighter blue pucks designed for younger players who are still developing wrist strength. The reduced weight helps them focus on technique rather than struggling to move a standard puck.
Mini-nets (48 inches wide) work better than full-size goals for station work because they’re portable and keep shooting drills compact. For skating development, plastic training chairs give beginners confidence while learning edges and balance, they’re stable enough to lean on but light enough that a fall won’t cause injury.
Stickhandling obstacles like adjustable hurdles and weave poles build puck control through repetition. Choose equipment that sits low to the ice (2-4 inches) so players develop proper head-up habits rather than looking down to clear tall obstacles. The best hockey training tools for this age group are durable enough to survive being knocked over repeatedly yet inexpensive enough to replace without breaking your budget.
Shooting targets (corner pockets or hanging target sheets) transform basic shooting into a game. Eight-year-olds respond well to visual goals, and targets make accuracy practice competitive and engaging.
Durability is critical, equipment that cracks or breaks mid-practice disrupts flow and wastes time. Invest in commercial-grade tools designed for team use rather than consumer products meant for backyard practice.
Off-Ice and Dry-Land Equipment
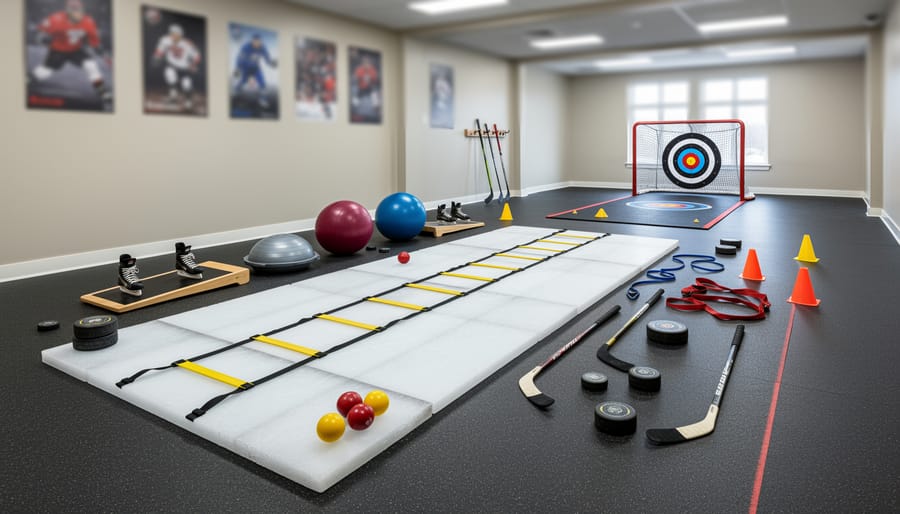
Off-ice training equipment extends skill development beyond ice time, which is especially valuable for 8U players who typically have limited rink access. Slide boards remain one of the most effective tools for building skating stride mechanics and leg strength at home. Look for boards between 6-8 feet long with smooth gliding surfaces and adjustable bumpers that accommodate young players’ shorter strides. The repetitive lateral movements reinforce proper weight transfer and edge work without ice.
Stickhandling balls and pucks designed for smooth surfaces let players practice puck control daily. Green biscuits, weighted balls, and traditional street hockey balls each offer different handling characteristics. Start with standard-weight options before progressing to heavier training pucks that build hand strength.
Balance equipment including wobble boards, balance discs, and stability cushions develop the core strength and ankle stability essential for skating. Eight-year-olds can spend 5-10 minutes daily on balance exercises that directly translate to improved on-ice stability. When you choose training devices for this age group, prioritize safety features like non-slip surfaces and appropriate height ranges.
Agility tools like speed ladders, mini hurdles, and cones create footwork drills that enhance coordination. These inexpensive items let coaches run structured dry-land sessions before or after ice time, maximizing total training minutes within limited practice schedules.
Safety Equipment Checklist
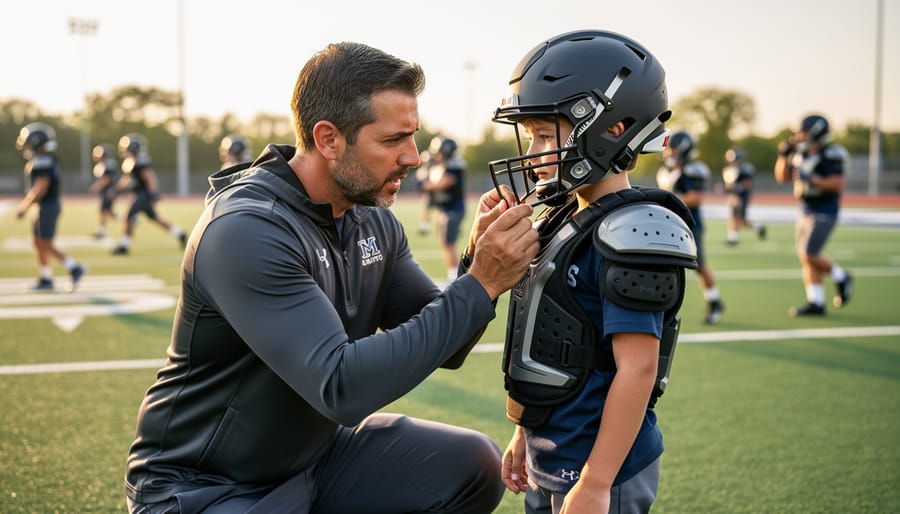
Every 8U player must wear a properly fitted CSA-approved helmet with full cage, mouthguard, hockey gloves, elbow pads, shoulder pads, hockey pants, shin guards, and skates. Helmets should sit level on the head with the chin strap snug enough that only one finger fits underneath, no rocking forward or backward when the player shakes their head. Hockey pants must cover the tailbone and kidneys, while shin guards should extend from just below the kneecap to inside the skate tongue.
Before each practice begins, walk the ice and visually verify that every player’s equipment is secure and age-appropriate. Check for cracked helmet shells, missing cage screws, or worn chin straps. Teach players to speak up if something feels uncomfortable or loose, 8-year-olds won’t always recognize when gear shifts during play. Keep a basic repair kit (extra cage screws, wax laces, tape) in your coaching bag so minor fixes don’t derail practice time.
Safety Considerations Before Starting Practice
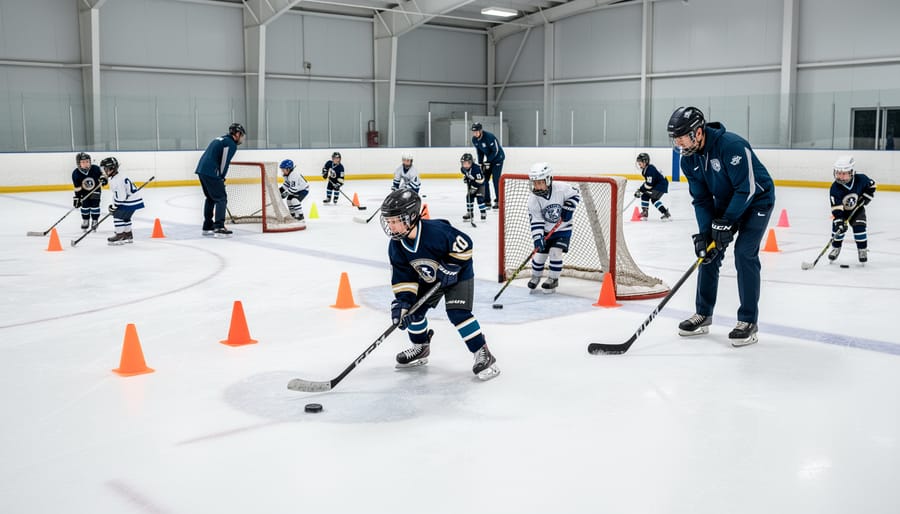
Safety at 8U practices isn’t just about having helmets, it’s about creating an environment where seven- and eight-year-olds can learn the five fundamental skills without unnecessary risk. Before players step onto the ice, walk the entire surface checking for dangerous cracks, uneven spots, or excessive snow buildup that could catch skate blades. Pay special attention to areas near boards and around the nets where players will be moving fastest.
Equipment inspection starts before practice begins, not during it. Check each player’s helmet for proper fit, it shouldn’t slide forward over the eyes or rock side to side, and verify that chin straps are fastened correctly. Gloves should have intact palms without holes, and skates need tight laces with no fraying. Insist that all protective gear meets current safety standards; at 8U, properly fitted equipment matters more than expensive brands.
Age-appropriate intensity means understanding that 8U players fatigue quickly and lose focus after 12-15 minutes of sustained activity. If you notice sloppy skating form, players falling more frequently, or kids looking down constantly instead of ahead, it’s time to shift to a lighter drill or take a quick water break. Never push through when multiple players are struggling with basic movements they demonstrated correctly earlier in practice.
Keep drills matched to current skill levels rather than forcing advanced techniques. When half the group can’t execute a drill safely after two attempts, simplify it or switch to something more foundational. Monitor the ice temperature too, overly soft ice increases injury risk as edges don’t grip properly, while extremely cold conditions can make pucks dangerously hard and fast for this age group.
Step-by-Step Process: Structuring Your 8U Practice Plan
Step 1: Pre-Practice Setup and Equipment Placement
Arrive 15-20 minutes before players to transform empty ice into an organized learning environment. Start by skating the full surface to check for any hazards, rough patches, snow buildup, or debris that could trip young skaters.
Divide your ice into clearly defined zones using cones or pylons. For 8U practices, three to four stations work best, giving each group enough space without overwhelming kids with too many transitions. Place your largest equipment first: position nets for shooting stations, set up the skating aid chairs along the boards, and mark boundaries for small-area games with bright cones at least six feet apart.
Group similar drills near each other to minimize equipment shuffling between rotations. Keep your puck bucket and extra equipment at center ice for quick access. Lay out all station equipment before practice starts, cones in lines, stickhandling obstacles ready, shooting targets hung, so you’re coaching, not scrambling, once players hit the ice.
Use the same station locations weekly. Kids learn the routine faster, and you’ll cut setup time in half by the third practice. Pre-label equipment bags by station to grab what you need without digging through everything each week.
Step 2: Dynamic Warm-Up (5-8 Minutes)
A proper warm-up at 8U needs to get bodies moving while keeping things simple and fun. Skip static stretching, young players warm up best through active movement that mimics what they’ll do in practice.
Start with basic skating laps around the perimeter cones to loosen legs and get comfortable on the ice. After one lap, add variations: skating backwards for half the rink, side shuffles between blue lines, or single-leg glides for balance. These progressions naturally increase heart rate without feeling like work.
Next, set up a simple obstacle course using 8-10 pylons in a zigzag pattern down center ice. Players weave through at increasing speeds, focusing on edges and crossovers. For players still developing balance, place skating chairs or push aids at the start so they can participate confidently while building strength.
Finish with a quick game of “Red Light, Green Light” or “Sharks and Minnows” using the full ice surface. These games require quick starts, stops, and directional changes, perfect for completing the warm-up while maintaining high engagement. Keep explanations brief; 8U players learn better by doing than listening to lengthy instructions.
The goal is loose muscles, elevated energy, and smiling faces before skills work begins.
Step 3: Skill Station Rotation (20-25 Minutes)
Skill station rotation forms the heart of an effective 8U practice, giving each player maximum touches while working on fundamentals. Set up 3-4 stations around the ice, with players spending 5-7 minutes at each before rotating. This timing matches 8U attention spans perfectly, long enough to gain repetitions, short enough to maintain focus.
Station 1: Skating Fundamentals
Use 8-10 cones placed 6-8 feet apart for weaving drills and tight turns. Add two skating chairs or pylons for players still developing balance. Focus on edges, crossovers, and quick starts. One coach or parent volunteer supervises form while players cycle through continuously.
Station 2: Stickhandling Circuit
Create an obstacle course with 6-8 small cones (18 inches high work best), 4-6 pucks, and optional stickhandling balls for variety. Players weave through cones while controlling the puck, then finish with a move around a pylon. This builds hand-eye coordination through exercises that translate directly to game situations.
Station 3: Passing and Receiving
Position 4-6 players in pairs with one puck per pair and a selection of passing targets or marked spots on the boards. Players practice give-and-go passes, saucer passes over stick obstacles (lay 2-3 sticks flat), and board passes. Emphasize proper weight transfer and follow-through.
Station 4: Shooting Skills
Set up a regulation or half-size net with shooting targets (hanging or magnetic) to create specific aim points. Place 8-10 pucks at various distances (8-15 feet for 8U). Focus on wrist shots and proper hand positioning rather than power. A shooter tutor or target corners improve accuracy focus.
Keep all players moving, no long lines. Adjust station complexity mid-rotation if needed based on skill levels you observe.
Step 4: Small-Area Game or Scrimmage (10-15 Minutes)
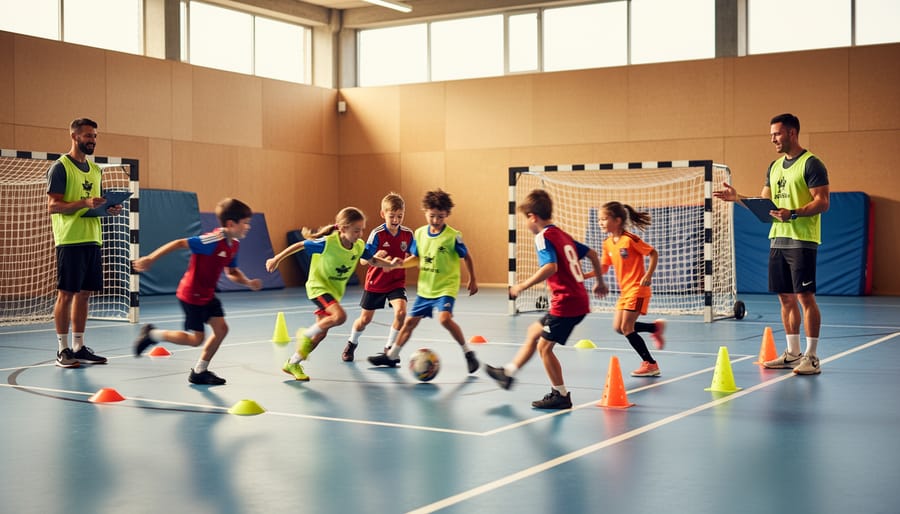
Small-area games transform skill practice into something 8U players actually want to do, play hockey. Set up a cross-ice format using the width of the rink rather than the full length, creating two or three mini-rinks with modified nets (4×6 feet works perfectly). This keeps all players engaged since they’re never far from the puck.
Use cones or pylons to mark clear boundaries, 8-year-olds need visual guides to understand their playing area. Keep teams to 3-on-3 or 4-on-4 maximum. Smaller numbers mean more touches, more decisions, and less standing around.
Simplify the rules drastically. No offsides, no icing, and consider no slapshots for safety. Focus on one concept per game: “pass three times before shooting” or “everyone must touch the puck.” These constraints teach without lecturing.
Position coaches on the ice, not yelling from the bench. You can pause play briefly to highlight good decisions or reposition players who’ve bunched up. If the game becomes one-sided, swap a player between teams immediately, competitive balance matters more than fixed rosters at this age.
The scrimmage should feel chaotic and fun, not structured. That’s intentional. Game situations teach decision-making that drills cannot replicate.
Step 5: Cool-Down and Skill Challenge (5 Minutes)
The final five minutes should shift from competitive play to fun, confidence-building activities that send players home excited about hockey. Choose one quick challenge that reinforces your practice focus, if you worked on skating, set up a relay race through cones; if puck handling was the theme, create a “fastest hands” stickhandling obstacle course using pylons and training balls.
Keep intensity low but engagement high. Obstacle courses work exceptionally well because 8U players love racing against themselves rather than direct competition. Set up a simple path using existing equipment: weave through four cones, circle a pylon, take one shot on net. Let each player attempt it twice, celebrating personal improvement rather than who finished first.
End with static stretching or a quick team cheer while players catch their breath, creating a positive routine that signals practice is complete.
Sample 8U Practice Plans with Equipment Lists
Here are three proven practice templates that work exceptionally well with 8U players, complete with equipment specifications and minute-by-minute timing.
Plan 1: Skating Fundamentals Focus (45 minutes total)
This plan prioritizes edge work and balance, foundational skills that determine everything else a player can do on ice.
Equipment needed: 20-25 small cones, 6-8 skating chairs or traffic cones, 15 pucks, 2 nets, 4 agility poles.
Warm-up (7 minutes): Players skate figure-8 patterns around two cones at center ice, then progress to one-foot glides along the boards. Station 1 (8 minutes): Forward and backward C-cuts using cones placed 10 feet apart. Station 2 (8 minutes): Crossover circuits around four cones in a square pattern. Station 3 (8 minutes): Edge control drills with chairs for support, inside edges pushing away from the chair, then outside edges pulling toward it. Scrimmage (10 minutes): Cross-ice 3v3 with emphasis on skating to open space rather than chasing the puck. Cool-down (4 minutes): Red-light-green-light skating game using whistle commands.
Plan 2: Puck Skills Development (45 minutes total)
This template builds confidence with stickhandling and passing through repetition and immediate success opportunities.
Equipment needed: 30-40 pucks, 8-10 stickhandling obstacles or cones, 2 nets, 4 passing boards or wall sections, 6 shooting targets (clip-on or magnetic).
Warm-up (6 minutes): Each player with a puck, practicing wide stickhandling while skating slowly. Station 1 (9 minutes): Stickhandling through cone weave patterns, progressing from stationary to moving. Station 2 (9 minutes): Partner passing with boards, 10 feet apart, focusing on sauce passes that land flat. Station 3 (9 minutes): Shooting accuracy using targets in corners; players collect their own rebounds and reset. Small-area game (9 minutes): 4v4 in one zone with the equipment that transforms basic skills into game situations, two nets, simplified rules about keeping sticks below the waist. Cool-down (3 minutes): Puck-handling relay race in pairs.
Plan 3: Team Play Introduction (45 minutes total)
Designed to teach basic positional concepts and passing sequences without overwhelming young players.
Equipment needed: 25 pucks, 12-15 cones for zone marking, 2 full-size nets, 2 mini-nets, 6-8 colored pinnies (two colors).
Warm-up (6 minutes): Follow-the-leader skating with a coach demonstrating starts, stops, and turns. Station 1 (10 minutes): 2-on-0 passing drills, partners pass back and forth while advancing on net, finishing with a shot. Station 2 (10 minutes): Defensive positioning using cones to mark zones; players practice staying between their zone markers and an attacking player. Scrimmage (15 minutes): Full-ice 5v5 with designated positions marked by pinnie colors; coach stops play to highlight good positioning examples. Cool-down (4 minutes): Shootout competition where every player gets two attempts.
Each plan balances structure with play, keeping drills under 10 minutes to match 8U attention spans. Rotate equipment between stations during water breaks to maintain engagement and avoid bottlenecks.
Verifying Practice Effectiveness and Making Adjustments
Assessing whether your 8U practice plan hit the mark isn’t about complex analytics, it’s about watching your players and listening to what the ice is telling you. The best verification happens in real time during practice and through quick reflection immediately after.
Start by observing engagement throughout the session. Are players actively participating in every drill, or do you see kids standing around waiting too long? Eight-year-olds should be moving constantly, with minimal idle time. If you notice wandering attention or players sitting down between rotations, your stations likely need tighter timing or more equipment to keep everyone busy.
Track simple skill progression markers specific to what you practiced. If you ran shooting drills, did most players make better contact with the puck by the end? After skating work, are they showing slightly more confidence in their edges? You’re not looking for mastery, just noticeable improvement within that single session.
Use these verification checkpoints to evaluate each practice:
- Player engagement levels, are kids excited, focused, and constantly moving?
- Skill progression markers, did you see improvement in the targeted skill by session end?
- Safety incidents, any collisions, falls, or equipment problems that interrupted flow?
- Equipment functionality, did all training tools work as planned or cause delays?
- Timing effectiveness, did each segment fit the planned duration without rushing or dragging?
After practice, spend two minutes jotting notes while details are fresh. What drill bombed? Which station had kids lined up too long? Did that shooting target fall over constantly?
Ask your assistant coaches or parent helpers for their observations, they see angles you miss while running drills. A simple “What worked today?” conversation reveals equipment gaps or timing issues you didn’t catch.
For player feedback at this age, keep it concrete and immediate. As kids leave the ice, ask “Which station was your favorite?” Their answers tell you what clicked. If nobody mentions your carefully planned passing drill, it probably needs redesigning.
When modifications are needed, change one variable at a time. If a station flopped, don’t overhaul everything, maybe you just need one more cone set or 30 fewer seconds per rotation. Test the adjustment next practice and verify again.
Expert Tips for 8U Practice Success
Experienced coaches who’ve spent years working with 8U players consistently emphasize one principle: less is more. At this age, attempting to teach too many concepts in a single practice creates confusion and frustration. Pick one or two primary skills per session and return to them repeatedly throughout the season. Your equipment investment goes further when you master creative variations of simple drills rather than buying specialized tools for every skill.
Keep your equipment setup mobile and flexible. Many successful 8U coaches use wheeled carts to transport cones, pucks, and small nets between stations, cutting transition time from three minutes to thirty seconds. The faster you move between activities, the less time players spend standing around losing focus. Position your next station’s equipment while players are still working at the current one.
Player engagement at 8U hinges on competition and peer interaction, not perfection. Transform static drills into races or challenges. Instead of asking players to complete ten stickhandling moves around cones, create a relay where teammates cheer each other on. The same equipment, reframed as a game, holds attention three times longer.
Make practice predictable in structure but varied in execution. Players thrive when they know practice always includes warm-up, stations, and a scrimmage, but the specific activities change. Use the same cones and nets in different configurations each week. This consistency reduces setup confusion while keeping content fresh.
Watch for the seven-minute threshold. Most 8U players lose focus at any single station after about seven minutes, regardless of how engaging the drill. Set a timer and rotate religiously, even if players are still having fun. You can return to popular drills later.
Finally, resist the urge to talk too much. Demonstrations beat explanations every time. Show the drill, let players try it immediately, then make one quick correction before restarting. Your expensive training equipment teaches nothing while sitting idle during lengthy coach explanations.
Common Questions About 8U Practice Planning
Starting an 8U hockey program often raises the same practical questions from first-time coaches and parent volunteers. Understanding these common concerns helps you plan more confidently and avoid expensive mistakes.
How long should 8U practices be?
Aim for 45-60 minutes maximum, including warm-up and cool-down. Younger players’ attention spans and energy levels decline rapidly after an hour, making longer sessions counterproductive.
What’s the minimum equipment needed to start?
You can run effective practices with just 20-30 cones, 20-25 pucks, two portable nets, and four skating chairs or pylons. This basic kit costs $200-300 and covers most fundamental drills.
How do I handle wide skill gaps within my team?
Use station-based practice formats where you can adjust difficulty at each station, add obstacles for advanced skaters, simplify patterns for beginners, or assign assistant coaches to work individually with struggling players during rotations.
Should we practice cross-ice or full-ice at 8U?
Cross-ice is strongly recommended for 8U because it increases puck touches, reduces skating distances, and creates more game-like situations in smaller spaces. Many associations now mandate cross-ice for this age group.
What’s a realistic equipment budget for a season?
Expect $400-600 for a well-equipped team if purchasing new gear, or $150-250 if you borrow association equipment and buy only consumables like pucks and replacement cones.
How many coaches do I need on the ice?
A 3:1 or 4:1 player-to-coach ratio works best for 8U station work. For a typical 12-15 player roster, that means three adults on ice, one head coach and two assistants or parent helpers.
The drill complexity question deserves special attention since many new coaches either oversimplify or overwhelm young players. At 8U, effective drills involve no more than two skills combined (skating plus passing, not skating plus passing plus shooting). If you need more than 30 seconds to explain a drill, it’s too complicated. Watch for glazed expressions or kids asking “what do we do again?” three times, that’s your signal to strip the drill down to one element.
Budget-conscious coaches can find creative alternatives without sacrificing quality. Pool noodles cut in half work as affordable stick-handling obstacles. Painter’s tape creates passing targets on boards. Empty laundry detergent bottles filled with sand become weighted pylons for a fraction of the cost of hockey-specific markers. Many associations also have equipment lending libraries where you can borrow specialized items like agility ladders or shooting targets for specific practice focuses rather than buying everything outright.
Building effective 8U hockey practice plans doesn’t require a massive equipment budget or overly complex drills. What matters most is selecting age-appropriate training tools that support fundamental skill development while keeping young players safe and engaged. The connection between thoughtful planning and proper equipment selection directly impacts how well your 7-8 year olds progress and, just as importantly, whether they enjoy the sport enough to continue.
If you’re new to coaching this age group, start with the basics. You can run highly effective practices with cones, pucks, a few nets, and standard protective gear. As you gain experience reading your players and managing ice time, gradually introduce additional training aids like stickhandling obstacles or shooting targets. The sample plans provided offer proven templates you can implement immediately, then modify based on your team’s specific needs and available equipment.
Your next step is straightforward: choose one of the sample practice plans that matches your current focus area, gather the listed equipment, and run that session. Pay attention to which drills keep players engaged and which lose their interest. After three or four practices, you’ll have enough feedback to start customizing plans that work specifically for your team. The players will show you what they need, your job is to create the structure and provide the tools that let them learn while having fun on the ice.