
The right hockey training devices will sharpen your stickhandling, shooting accuracy, and skating mechanics without needing ice time, but choosing effective tools means understanding which devices target your specific weaknesses and deliver measurable progress. Most players waste money on flashy gadgets that collect dust in the garage instead of focusing on proven systems that mirror game conditions and build transferable skills.
This guide cuts through the marketing hype to show you exactly what works. You’ll learn how to match device categories to your training goals, whether you’re a youth player building foundational skills or an elite competitor refining specific techniques. We’ll compare the core device types, highlight the selection factors that separate effective tools from expensive distractions, and point you toward options that coaches and professional trainers actually recommend for off-ice development.
The key is prioritizing devices that recreate realistic puck feel, resistance patterns, and movement sequences you’ll use in games. Equipment that forces proper weight transfer, hand positioning, and follow-through will improve your performance far more than passive aids or gimmicks that feel nothing like actual play. By the end of this guide, you’ll know which devices deserve your training budget and which common purchasing mistakes to avoid, so every dollar you spend translates into measurable skill gains when you hit the ice.
What Hockey Training Devices Actually Do
Hockey training devices create controlled environments where you can isolate and repeat specific movements until they become automatic. Unlike game situations or even regular practice, these tools let you focus on one element, wrist shot release, edge work transitions, or puck protection moves, without the chaos of defenders, teammates, or shifting drills. That focused repetition builds muscle memory faster than sporadic practice alone.
These devices complement ice time by addressing the five fundamental skills in ways rink sessions can’t always accommodate. A shooting pad in your garage gives you 500 wrist shots per week instead of 50 during team practice. Stickhandling balls let you work on hand speed while watching film. Slide boards develop the lateral push and recovery mechanics that define powerful skating strides, and research confirms that off-ice agility transfers to ice performance when the movements mirror on-ice demands.
Beyond technique, these tools address strength and conditioning needs specific to hockey. Weighted sticks overload your shooting muscles, resistance bands replicate skating resistance, and balance boards challenge the core stability required for body positioning in battles. You’re not just practicing skills; you’re conditioning the exact muscle groups and movement patterns the game demands, making your ice time more productive because your body is prepared to execute at higher intensity.
Essential Factors to Consider Before Buying
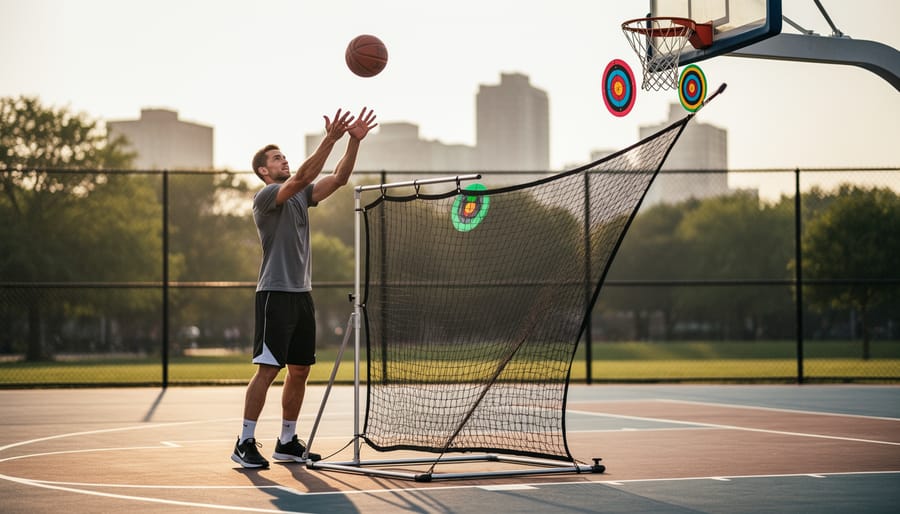
Matching Devices to Your Skill Level
Beginners need simple, foundational devices that build basic skills without overwhelming technique. Start with a basic stickhandling ball and a shooting pad, these teach proper hand positioning and shot mechanics before adding complexity. Avoid advanced targets or weighted equipment that can ingrain bad habits. Your focus should be mastering fundamentals with tools that provide immediate feedback and allow high repetition.
Intermediate players benefit from devices that add challenge to established skills. Introduce weighted pucks for shot power, obstacle courses for stickhandling speed, and resistance bands for skating stride development. You’re ready for tools that refine technique rather than teach it. Look for adjustable difficulty levels, shooting targets with smaller zones, variable-weight training pucks, or progressive resistance systems that grow with your abilities.
Advanced players should invest in specialized devices targeting specific weaknesses or position demands. These include high-end shooting systems with precise feedback, advanced agility trainers, and sport-specific strength tools. At this level, choose devices that simulate game-speed situations and provide measurable performance data. Your selection should complement professional coaching and address the nuanced technical details that separate good players from elite ones.
Training Goals and Device Alignment
The most effective training device purchases start by identifying one or two specific weaknesses you want to address. Players chasing better shooting accuracy need tools that provide repetition with immediate feedback, shooting pads paired with target trainers let you take hundreds of shots while seeing exactly where each puck hits. For stickhandling speed improvements, focus on devices that increase hand quickness and puck feel: weighted training pucks build strength while stickhandling balls force tighter control in confined spaces.
Skating power development requires a different approach entirely. Slide boards, resistance bands anchored for skating-specific movements, and weighted vests during off-ice agility drills all build the explosive leg drive that translates to better performance on ice. Don’t scatter your budget across every category. Pick the goal that matters most for your position and playing style, invest in two or three complementary devices for that area, then expand once you’ve built consistent training habits around them.
Space and Portability Considerations
Your training space dictates which devices make practical sense. Measure your available area before buying, a full-size shooting pad needs roughly 8×16 feet of clear floor space, while stickhandling balls work in a 4×4 foot square.
Garage setups accommodate larger equipment like rebound systems and slide boards, but consider ceiling height for shooting drills. Basement trainers need low-profile options that won’t damage joists or lighting. Apartment dwellers should prioritize compact, quiet devices like weighted pucks and resistance bands that store easily.
Portability matters if you train in multiple locations. Look for foldable shooting pads, collapsible nets, and lightweight stickhandling tools that fit in a equipment bag. Heavier permanent installations like synthetic ice tiles deliver better performance but eliminate flexibility.
Choose devices that maximize your actual space, not your ideal training room.
Quality and Durability Markers
When evaluating training devices, construction quality directly impacts how long your investment lasts. Look for synthetic ice tiles made from high-density polyethylene rather than thin plastic that warps. Shooting pads should use multi-layer materials with reinforced edges, cheap single-ply versions crack within months. Metal components like net frames need powder-coated steel, not lightweight aluminum that bends.
Check warranty length as a confidence indicator. Reputable manufacturers offer 1-2 year coverage on major components because they know their products hold up. Anything under 90 days suggests corners were cut. Read customer reviews specifically mentioning durability at the 6-month and 1-year marks, not just initial impressions.
Established brands like HockeyShot, Pro Guard, and Green Biscuit have years of product evolution behind them. Unknown manufacturers selling exclusively through marketplaces often disappear when issues arise, leaving you without replacement parts or support.
Types of Hockey Training Devices Compared
Shooting and Scoring Aids
Shooting pads give you a smooth surface that mimics ice friction, letting you practice wrist shots, slapshots, and one-timers without leaving your driveway. They protect your sticks and pucks while building muscle memory for proper release mechanics. Target trainers hang in net corners or attach to shooting pads, forcing you to aim for specific spots rather than just firing randomly, consistent accuracy work that translates directly to goal-scoring on ice.
Puck return systems bounce shots back to you, eliminating the constant retrieval that kills training momentum. You can run shooting drills for twenty minutes straight, working release speed and shot variety without chasing pucks. Rebound boards simulate deflections and loose pucks around the net, training quick hands and reaction shots that happen in real game situations. When selecting from the best hockey training toolsprioritize shooting pads with realistic puck glide and durable surfaces over cheaper options that wear through quickly. Look for target trainers with adjustable placement and rebounders built from high-density materials that won’t crack after a few hundred shots.
Stickhandling and Puck Control Tools
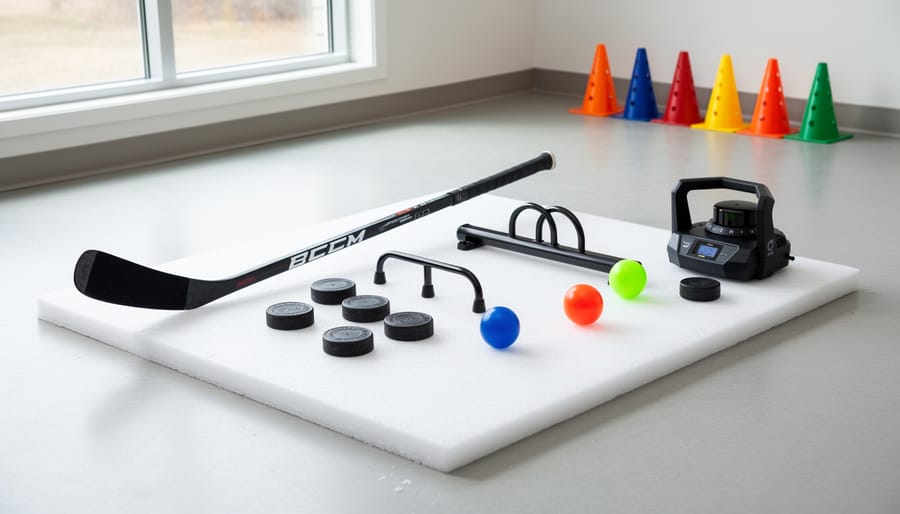
Stickhandling balls are the most versatile tools in this category. They’re heavier and smaller than regulation pucks, forcing you to develop soft hands and precise control. Green Biscuit pucks slide smoothly on concrete and asphalt, letting you practice realistic stickhandling patterns in your driveway. They’re durable enough for daily use and won’t damage surfaces.
Weighted pucks build wrist strength and improve your ability to handle the puck under pressure. Standard versions weigh 10 ounces versus a regulation 6-ounce puck. Use them for stationary drills, not shooting, they can damage sticks and nets.
Training tiles create a slick surface anywhere. Interlocking panels simulate ice conditions for stickhandling without needing a shooting pad. They’re portable and store flat, making them ideal for apartment or garage training.
Obstacle sets, cones, pylons, and adjustable barriers, add complexity to your drills. They teach you to handle the puck while navigating traffic and develop the quick hands needed in tight spaces during games. Look for sets with at least 12 pieces to create varied patterns that prevent your muscle memory from going stale.
Skating and Agility Equipment
Slide boards replicate the lateral push-off motion of skating, building hip strength and edge power without ice. They’re particularly effective for developing the explosive stride extension that translates directly to faster acceleration. Quality boards feature smooth polymer surfaces with adjustable end blocks and come in lengths from 6 to 9 feet, longer boards suit advanced players working on full stride mechanics.
Resistance bands designed for hockey attach to a harness or belt, allowing players to practice starts, crossovers, and backwards skating against progressive resistance. They’re compact, inexpensive ($15-40), and ideal for building specific skating muscles. Look for bands with multiple resistance levels so you can scale difficulty as strength improves.
Agility ladders develop quick feet, coordination, and the rapid direction changes skating demands. While not hockey-specific, they’re valuable for footwork patterns that carry over to pivots and tight turns. Durable nylon ladders with adjustable rungs ($20-35) work well for varied drills.
Skating-specific trainers like balance boards and slide mats challenge stability and mimic skating’s balance demands. These tools are most effective when combined, slide boards for power, bands for resistance, ladders for agility creates comprehensive off-ice skating development.
Strength and Conditioning Devices
Strength and conditioning devices translate on-ice demands into focused off-ice workouts that build the power, stability, and endurance hockey requires. These tools target the specific muscle groups and movement patterns you use during games, making your training time more efficient than generic gym equipment.
Weighted vests add resistance to bodyweight exercises, plyometrics, and skating simulation drills without restricting arm movement. Look for adjustable models between 10-20 pounds that distribute weight evenly across your torso. They’re particularly effective for building explosive power in jumps and direction changes.
Stick weights attach to your blade or shaft, turning stickhandling and shooting practice into strength work. Start with 4-6 ounce attachments and progress gradually, overloading too quickly can alter your mechanics. Remove the weight before finishing each session to feel the speed improvement.
Core training devices like resistance bands with hockey-specific anchor points, balance boards, and rotational trainers strengthen the trunk stability that powers your shot and protects against injury. Prioritize tools that mimic skating positions and shooting motions rather than standard ab equipment.
Resistance bands and sliders create variable tension for skating stride development, lateral movement training, and upper body strength without requiring fixed equipment or large spaces.
Goalie Training Devices
Goalies face unique training demands that require specialized devices targeting reflexes, lateral movement, and positional flexibility. Reaction balls with unpredictable bounce patterns sharpen hand-eye coordination and glove saves during solo sessions. Goalie slide mats replicate game-like lateral movements across the crease without ice, building muscle memory for quick shuffles and recoveries. Flexibility aids like stretching straps and hip flexor trainers help goalies achieve and maintain the deep butterfly positions essential for modern netminding.
Foam reaction balls typically cost $15-30 and work anywhere, while quality slide mats run $200-500 depending on size and surface material. Yoga blocks and resistance bands ($20-40) effectively support off-ice flexibility work. The best goalie training investments combine reaction training with movement-specific tools, a reaction ball for warmups, a slide mat for technique work, and flexibility aids for cooldowns creates a complete development system that addresses the position’s distinct physical requirements.
Our Recommendations by Training Focus
Best Devices for Shooting Development
For players serious about improving their shot, a quality shooting pad remains the foundation, look for models at least 4 feet by 8 feet with genuine puck glide characteristics, like the HockeyShot Extreme Glide or SuperDeker Pro Surface. Pair it with a corner snipe target system that attaches to any net; these visual targets build muscle memory for hitting specific scoring zones consistently.
A puck rebounder transforms solo shooting sessions by returning pucks automatically, letting you fire 50-100 shots without constant retrieval. The best rebounders offer adjustable angles to simulate different passing scenarios. Add a radar gun (many accurate models now run under $100) to track your shot speed improvements over weeks and months, measuring progress keeps motivation high and reveals what techniques actually boost your velocity.
Top Stickhandling Trainers
The Swedish Stickhandling Ball remains the gold standard for off-ice puck control development. Its weight and surface texture replicate puck feel better than alternatives, and it works on any hard surface, garage floors, driveways, or basement concrete. Expect to pay $15-25 for a quality ball that lasts years.
For players serious about hand speed, the HockeyShot Extreme Passing Kit combines a training tile with rebounding obstacles. The slick surface forces quicker hands while the adjustable barriers teach controlled passing angles. It’s pricier at $150-200, but the challenge progression keeps intermediate and advanced players engaged far longer than basic stickhandling balls alone.
Weighted training pucks (4-10 oz) build wrist strength when rotated into regular practice sessions, though they shouldn’t replace standard-weight work entirely.
Skating and Speed Enhancement Tools
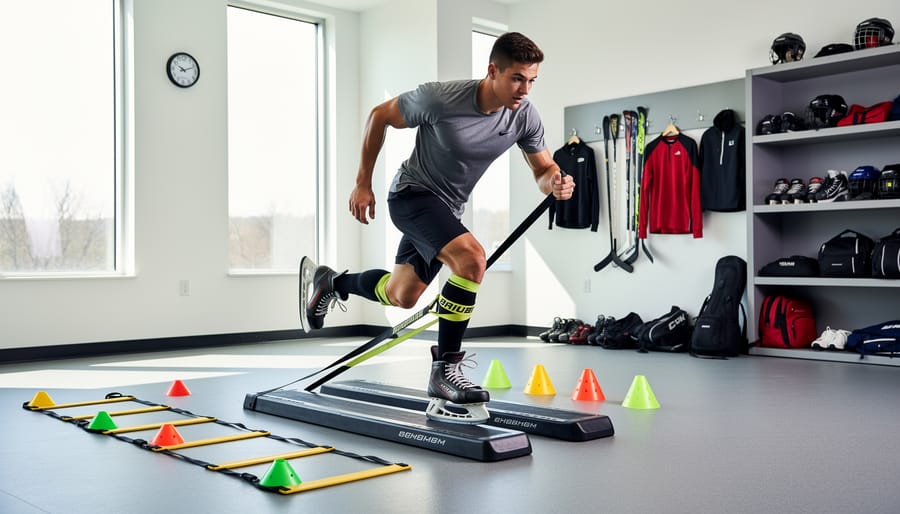
The slide board remains the gold standard for off-ice skating development. Mimicking the lateral push-and-glide motion of skating, slide-board training improves power output in the specific muscles driving your stride, glutes, hip adductors, and outer thighs. Look for boards six to eight feet long with adjustable end blocks and a smooth, consistent surface. Heavy-duty resistance bands designed for skating add another dimension: attach them to a fixed point and perform skating strides against tension to build explosive push-off strength. These bands typically come in progressive resistance levels, so you can increase load as you get stronger.
For agility and quickness, combine a standard agility ladder with skating-specific cone drills. The ladder develops foot speed and coordination off-ice, while tight cone patterns train the hip mobility and edge-work angles you need on ice. Weighted vests (start light, five to ten pounds) worn during these drills add resistance without altering your movement mechanics, building the stamina to maintain speed through three periods.
Complete Home Training Setup
A well-rounded home setup doesn’t require every device on the market, just the right combination to cover shooting, stickhandling, and conditioning. Start with a quality synthetic ice shooting pad (4×8 feet minimum) paired with a puck return system. This duo lets you practice release mechanics and accuracy daily without chasing rebounds. Add a set of stickhandling balls in progressive weights and a small training tile section for puck control work in tight spaces.
For lower-body development, include a slide board and resistance bands with door anchors. The slide board builds lateral push power and edge work, while bands strengthen stride mechanics and hip stability. Round out the setup with weighted training pucks and a basic agility ladder for footwork drills between skating sessions.
This core collection addresses the key skill areas that transform average to elite performers, costs roughly $400, $600 total, and fits in most garage or basement spaces. You can train shooting, hands, and conditioning five days per week without ice access, then add specialized devices as specific weaknesses emerge.
Common Mistakes to Avoid When Buying
The most expensive mistake hockey players make is buying devices that look impressive but don’t align with their actual training needs. A $300 shooting system won’t improve your accuracy if your fundamental issue is weight transfer and release technique, you’d be better served by a $40 shooting pad and focused repetition on mechanics.
Chasing the lowest price consistently backfires. Budget devices made from thin plastic or weak materials break quickly under regular use, forcing you to buy replacements that cost more in the long run than investing in quality upfront. A durable stickhandling ball that lasts three years beats replacing a cheap version every six months.
Many players buy an entire arsenal of devices at once, then feel overwhelmed and use nothing consistently. Start with one or two tools focused on your primary weakness, build a routine around them, then add equipment as you master each training element. A single device used four times weekly beats five devices collecting dust.
Space miscalculations waste money and create frustration. Measure your training area before buying, that regulation-size shooting pad won’t fit in a narrow garage, and a slide board needs clearance on both ends. Compact, versatile devices often deliver better value for home training than full-size equipment you can’t properly use.
Buying devices because teammates or social media influencers recommend them ignores your individual development stage and goals. A pro-level resistance trainer designed for NCAA players will frustrate a 12-year-old, while advanced players waste time with devices meant for beginners. Match equipment to where you are now, not where you want to be eventually.
Expert Interview: Building an Effective Training Device Collection
We spoke with Marcus Chen, a skills development coach with 12 years of experience training players from house league to junior A, about building a training device collection that actually gets used.
“The biggest mistake I see is players dropping $800 in one shopping trip and then letting half of it collect dust,” Chen says. “Start with one or two foundational pieces that address your weakest area. If your hands need work, grab a good stickhandling ball and training tiles. If shooting is the issue, invest in a quality shooting pad and a few pucks. Master those before adding more.”
Chen recommends the 80/20 approach: spend 80% of your training time on basic devices you’ll use consistently, and only 20% on specialized tools. “A $30 stickhandling ball will do more for most players than a $200 fancy gadget they use twice.”
His suggested building order for a complete setup: start with stickhandling tools, add shooting aids second, then conditioning equipment, and finally specialized or position-specific devices. “This mirrors how skills build on each other. You need puck control before shot accuracy matters.”
For integration into training routines, Chen structures sessions around device rotation rather than using everything at once. “Monday might be 20 minutes on the slide board and stick weights. Wednesday is shooting pad work with targets. Friday combines stickhandling obstacles with agility ladders. Each device gets focused attention, not rushed five-minute cameos.”
He emphasizes buying devices that match your actual training space and schedule. “If you have 15 minutes before dinner in a basement corner, choose compact tools you can set up in 30 seconds. The best device is the one you’ll actually use three times a week.”
Frequently Asked Questions
Training devices raise practical questions for players and parents investing in off-ice development. Here are answers to the most common concerns we hear from buyers.
How often should I use training devices for noticeable improvement?
Most players see measurable progress with 3-4 focused sessions per week, 20-30 minutes each. Consistency matters more than duration, regular short sessions outperform sporadic long ones.
Do training devices replace ice time?
No. Devices supplement on-ice practice by building muscle memory, strength, and technique that transfer to game situations. They’re tools for extra repetitions and targeted skill work, not substitutes for skating and team practice.
What age should kids start using training devices?
Basic stickhandling tools work well for players as young as 5-6 years old. More specialized devices like shooting pads and resistance equipment are most effective once players have foundational skills, typically ages 8-10 and up.
How do I maintain training devices?
Wipe down synthetic ice and shooting pads after each use, store rubber products away from direct sunlight, and check resistance bands regularly for wear. Most quality devices require minimal maintenance beyond basic cleaning and proper storage.
Are training devices worth the investment?
For committed players, yes. A $200-400 investment in core devices provides years of focused practice opportunities that would otherwise require expensive ice time. The return comes through accelerated skill development and increased training flexibility.
Can adults use the same devices as youth players?
Most devices work across age groups, though adults may need heavier pucks, higher resistance settings, or larger equipment dimensions. Check product specifications for weight limits and adjustability before purchasing.
Beyond these common questions, remember that your specific training goals should guide device selection more than general advice. What works for a player focused on shooting power differs from what a defenseman needs for skating strength. Start with one or two targeted devices, establish a consistent routine, then expand your collection as you identify gaps in your training.
Choosing the right hockey training devices comes down to clarity about your goals and honesty about your commitment. The best equipment won’t transform your game on its own, it amplifies the work you’re already willing to put in. Start with devices that address your biggest weakness or support your primary training focus, whether that’s shooting accuracy, stickhandling speed, or skating power. Build your collection gradually as you develop consistent training routines, not all at once in a burst of enthusiasm that fades.
Quality matters more than quantity. A few well-chosen, durable devices you’ll actually use beat a garage full of dusty equipment that seemed like a good idea at the time. Remember that training devices work best when integrated into structured practice sessions alongside effective off-ice exercises and regular ice time. They’re tools that support your development, not shortcuts around the fundamentals of practice and repetition.
The players who see real results are those who match their purchases to specific, measurable objectives and then use those devices consistently. Smart equipment choices create opportunities for deliberate practice whenever you have fifteen minutes to spare, turning downtime into development time and keeping your skills sharp between ice sessions.